The Timeless Tradition of the Letterman Jacket
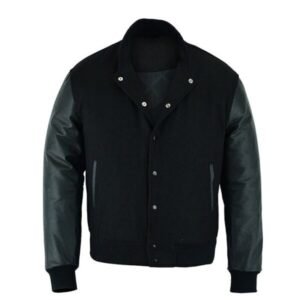
There is something undeniably iconic about a varsity jacket. Pulling on a heavy wool body with genuine leather sleeves instantly connects you to generations of athletes, scholars, and style icons. But a blank jacket is just a canvas. The real magic happens when you start adding patches. Earning a varsity letter is a massive milestone, but figuring out where to put patches on a letterman’s jacket can quickly turn from an exciting project into an overwhelming puzzle.
If you have a collection of chenille letters, sport emblems, championship pins, and graduation years sitting on your desk, you are probably wondering where each piece belongs. Do championships go on the right or left sleeve? Does the graduation year sit above or below the pocket? While high schools and universities often have strict tradition-based rules for placement, modern custom jackets give you total creative freedom. Let’s break down the ultimate blueprint for patch placement so your jacket looks balanced, traditional, and effortlessly cool.
The Anatomy of a Varsity Jacket: Mapping Your Canvas
Before you even think about grabbing a needle and thread or taking your jacket to a tailors, you need to understand the structural zones of a standard letterman jacket. Each section has a specific purpose and traditional layout.
- The Left Chest: This is prime real estate. It is reserved almost exclusively for your primary school letter or main mascot chenille emblem.
- The Right Chest: Typically reserved for secondary achievements, your name, graduation year, or leadership titles like team captain.
- The Left Sleeve: Traditionally used for athletic honors, positions, and sport-specific patches earned over multiple varsity seasons.
- The Right Sleeve: Usually dedicated to team championships, tournament wins, jersey numbers, and major milestones.
- The Back: The showstopper. This large open space is ideal for a massive school name, graduation year arc, mascot graphic, or club logo.
Positioning the Left Chest: The Home of the Primary Letter
The left chest is the heart and soul of any letterman jacket. When people look at your jacket, their eyes naturally gravitate here first. The golden rule of varsity jacket etiquette is that your primary school letter goes on the left side, sitting directly over your heart.
When positioning your primary chenille letter:
- Centering: Center the letter between the center zipper line (or snap placket) and the side seam of the jacket, roughly aligned with the top pocket welt.
- Height: The bottom of the letter should generally sit right above or just touching the horizontal welt of the left pocket, though some traditional styles place it slightly higher up on the chest.
- Adding Sport Inserts: If you earned a megaphone for cheer, a crossed bat for baseball, or a football insert inside your letter, these are stitched directly into the center or across the base of the chenille letter itself.
Mastering the Right Chest: Balance and Personalization
With the left chest claimed by your primary letter, the right chest offers fantastic opportunities for personalization and secondary honors. Because the left side is heavy and bold, the right side needs to balance it out without looking cluttered.
Popular choices for the right chest include:
- Your First or Last Name: Often embroidered in script or block letters directly onto the wool, or featured on a custom leather/felt name patch placed horizontally across the right chest.
- Graduation Year: A two-digit or four-digit graduation year patch can sit neatly on the upper right chest, mirroring the visual weight of the left-chest letter.
- Leadership Emblems: Small bars or patches denoting roles such as Team Captain, President of the Debate Club, or Senior Class Officer fit perfectly on the upper right panel.
Sleeve Placement: Tracking Your Athletic and Academic Journey
The sleeves tell the story of your progression through high school or college. Both leather and wool sleeves can accommodate patches, but leather sleeves require heavy-duty sewing equipment or professional tailors due to their thickness.
The Left Sleeve Layout
Traditionally, the left sleeve documents your longevity and varsity participation. Common placements include:
- Varsity Bars/Chevrons: Horizontal stripes or bars stacked vertically starting a few inches below the shoulder seam, representing each year or season played on the varsity team.
- Position Patches: Specific position indicators (like Quarterback, Pitcher, or Point Guard) placed just below the varsity stripes.
The Right Sleeve Layout
The right sleeve is typically where you flex your team’s collective accomplishments. Use this space for:
- Championship Patches: State championship, district winner, or tournament title emblems centered between the shoulder and elbow.
- Jersey Numbers: Your playing number rendered in large felt or leather block digits, often centered neatly on the upper arm area.
- Sport Specific Icons: Smaller sport balls, musical notes, or academic pins arranged in a clean vertical or diagonal line.
The Back Panel: Making a Bold Statement
If the front of the jacket is classic and understated, the back is where you can go all out. The expansive upper back panel is designed for large-scale graphics that announce your school pride or personal identity from across a crowded bleacher.
When designing the back of your jacket, consider these layout ideas:
- The School Name Arch: A large, curved felt patch spelling out your high school or university name across the shoulder blades.
- Mascot Artwork: A massive embroidered mascot—whether it’s a bulldog, tiger, eagle, or pirate—centered right in the middle of the back panel.
- Graduation Year Banner: Large numbers stretching horizontally across the lower or middle back panel to commemorate your class year.
Be careful not to crowd the back too much. Leaving some negative space around your back graphics makes the overall design look clean and high-end rather than messy.
Step-by-Step Guide to Applying Your Patches
Once you have decided where every patch goes, you need to secure them properly. Making mistakes here can ruin the jacket material, especially genuine leather sleeves.
- Dry Run / Layout Phase: Lay your jacket flat on a large table. Place all your patches on the jacket using straight pins or painter’s tape. Step back and look at it from a few feet away to check for symmetry and balance.
- Mark the Spot: Use tailors chalk to outline the final position of each patch so you don’t lose your layout when you pick them up.
- Glue vs. Sewing: Many modern patches come with a heat-activated adhesive backing. While iron-on backing is great for temporary placement, it will eventually peel off the leather or wool under stress. For a permanent hold, always sew your patches down.
- Professional Help: If you are sewing onto thick cowhide or Melton wool, visit a local leatherworker or tailor. They have industrial sewing machines that can pierce thick layers without bending needles or ruining your jacket.
Ready to Create Your Custom Masterpiece?
Why wait to earn patches when you can design a fully custom varsity jacket tailored precisely to your style, colors, and patch layouts? Whether you want a classic retro look or a modern streetwear vibe, premium craftsmanship makes all the difference.
Frequently Asked Questions
Can I put iron-on patches on genuine leather sleeves?
It is generally not recommended to use iron-on heat adhesives on genuine leather sleeves because high heat can warp, melt, or discolor the leather. Instead, use fabric glue dots for temporary placement and have the patches professionally stitched down by a tailor.
Is there a strict rule about which side the varsity letter goes on?
Yes. Tradition dictates that your primary school letter or main chenille emblem is always placed on the left chest directly over your heart. Secondary patches like names, graduation years, and pins go on the right chest or sleeves.
How do I prevent my jacket from looking too cluttered?
To avoid a cluttered look, group similar patches together (such as putting all athletic championship patches on the right sleeve and academic pins on the collar or pocket). Leave some empty space on the wool and leather so each individual achievement stands out clearly.
Can I remove patches if I change my mind later?
Removing stitched patches is possible using a seam ripper, but be careful. Older wool and leather jackets may show needle holes or slight fading where the patch previously protected the fabric from UV light and wear.